Thursday 19 December 2019

Artcuts Christmas in Red

Artcuts in Red

Christmas is rapidly approaching and I've just realized I didn't post my Christmas samples for Artcuts. They are made with the lovely birch wood shapes that Artcuts laser cut.

These make lovely decorations for the tree and are fun to put on a card.


They are all very simple to make , the colour red being applied with a Versamagic inkpad. Very quick and clean. The patterns are stamped with silver using Hobby Art stamps.
 
The white and red ones use a crackle technique for the background , with acrylic paint. 


The hearts look lovely , strung together as a Christmas garland.
Hope you get chance to try some of these for next years decorations.


Wishing you a very happy Christmas
Carole

Tuesday 3 December 2019

Chocolate Baroque Steampunk on Hochanda


Hello everyone
 
.
Have fun today watching Chocolate Baroque on Hochanda at 10am. and 2pm, highlighting their Steampunk stamps. These are fun, quirky stamps and there will be loads of great samples by the design team.
 
 
Steampunk Sea World Rubber stamp sheet - A5


Steampunk Birds Rubber stamp sheet - A4


Been out of action a bit with my crafting recently, but will post a few ideas using the stamps above
later today. Hopefully!
 
Happy crafting
Carole
 

Saturday 30 November 2019

Artcuts Christmas in Blue


Artcuts in Blue.

Blue, white, silver, my favourite colours together for Christmas.
Below are some of my Artcuts  Christmas samples. Very quick and easy to make and they are a lovely addition to a card for those special friends who will appreciate it.
A small gift and card combined.


I have used Versamagic inkpads to colour and stamped over with Versamagic also. This inkpad will not bleed on the wood.
The Chiyogami papers  are used for the strips, as well as ribbon.

                     Artcuts Christmas in Red to follow soon.
           Bye for now
            Carole

Tuesday 8 October 2019

Chocolate Baroque Sea Theme


Hello.
Below are a couple more sea related cards that I have made with the Chocolate Baroque  Mermaid Queen stamp set.


This seahorse stamp is so cute. The stamp has been embossed with clear embossing powder over black ink. Then I have heated small areas again and put gold foil over, which adheres to the warm embossed areas..

The words are actually straight but can be shaped on the acrylic block to form the arc shape.


The second sample uses stamps from various sets. Mermaid Queen, Seaside Dreams, words from Seaside scenes.
 
The background at the bottom was clear and white embossed and then inked over with Distress inks.
The mermaid section was embossed and cut out to over lay the background.


Thank you for visiting and I hope you have enjoyed this post.
 

Wednesday 25 September 2019

Guest Designer Post September 2019 - Seahorses


Hello everyone..

My final contribution for September goes under the sea.
What a great stamp set this is, I just wish I had more hours in the day to 'play' with it more.

I have used  the Mermaid Queen set, to create this under water scene.


Products used: Mermaid Queen stamp set, acrylic paints, thin acetate, permanent inkpad that will dry on acetate and shrink plastic, gold pen and thread.
 
I started with the background so that it would dry, while I did the rest.
 
Cut an A4 piece of acetate in  half, and squeeze several different
 colours of acrylic paint onto one half.
Place  the other half of the acetate on top and run your hand over it to spread the paint.
Pull the two sheets apart and an interesting pattern may occur.


. At this stage you could sprinkle a little glitter over while the paint is wet. I tend to make a larger acetate piece so that I can cut out the most interesting section.
  Put aside to dry thoroughly.
 
The seahorse was stamped and embossed, then coloured with a gold glittery pen and the tiny one is done with shrink plastic. Very cute it is too.
 
The shells are full size .
 
Once the background was dry, I stamped the seaweed onto the front with a permanent inkpad. (I used Staz-on) and the card was assembled.
 
Well that's it for this session. I look forward to showing more ideas in my next slot.
 
Thank you for your comments, they are always appreciated. 
Best wishes
Carole


Wednesday 18 September 2019

Guest Designer post - September 2019 - Indian Elephants


Hello everyone.

I am delighted to be here again and have a very different sample today from my previous one.

 I have chosen to use the beautiful Indian Elephant set of stamps for my sample. This set always conjures up colour to me so I have used brightly coloured Distress inks for the background.


The card front has two layers The top one has a die cut label hole cut into the centre to form an aperture with  two labels either side.

The layer behind was coloured and then the tree stamped, so that it was positioned centrally and would fit into the aperture space.
The two elephants were stamped, coloured and cut out.
The top layer and labels were then coloured  and the labels stuck onto the base. The front section was over stamped with the top of the tree.

This stamp set is so pretty and it has a variety of lovely images on it.

Thank you for visiting and hope to see you next time.
Bye for now
Carole

Wednesday 11 September 2019

Guest Designer September 2019 - Russian Floral Egg coaster


Hello everyone.
 I am delighted to be here again for my September guest designer slot.

We all have stamps sitting in our stash that we look at and think I must do something with that, as I haven't used it for ages. So I have done just that for my projects this time.


I have been meaning to make this first project for ages, so what better time than now.

I have used the Russian Floral Egg stamp, which I think is a really pretty design.
I made it to be a large coaster, the button is flush with the edge of the hearts.


Products used: Russian Floral Egg stamp, five 8cm. wooden hearts, one 12cm. circular shape to mount them onto, black Brilliance inkpad, clear embossing powder, Distress inks to colour  or water colour pencils, glossy accents.


  Stamp the design and immediately cover with clear embossing  powder. I find it easier to ink the stamp up and place the heart onto it, so you can see exactly where it is positioned. Heat emboss, being aware that the wood gets surprisingly hot. Colour the flower and leaves.


 Put glossy accents over the coloured areas and leave to dry thoroughly.
 
 
 When the glossy accents is dry, colour the background. It doesn't matter if you go over the glossed areas as any gaps in the glossy accents will pick up the colour, giving a slightly distressed look.
I then sanded around the edge lightly.

I coloured the centre of the circle before sticking the hearts in place with a good quality PVA glue.

The centre will make a star shape and I found a lovely , conveniently sized, button to put in the centre.I sprayed the whole thing with a matt varnish to help protect it.

I think this would be lovely with a more Christmassy design on it, as a candle holder. Must work on that.


A couple of other ideas I have done uses the design for  book marks.
 This is a lovely gift for a friend who likes reading real books.
My daughter has a variety of book marks so she is an ideal recipient for my efforts.


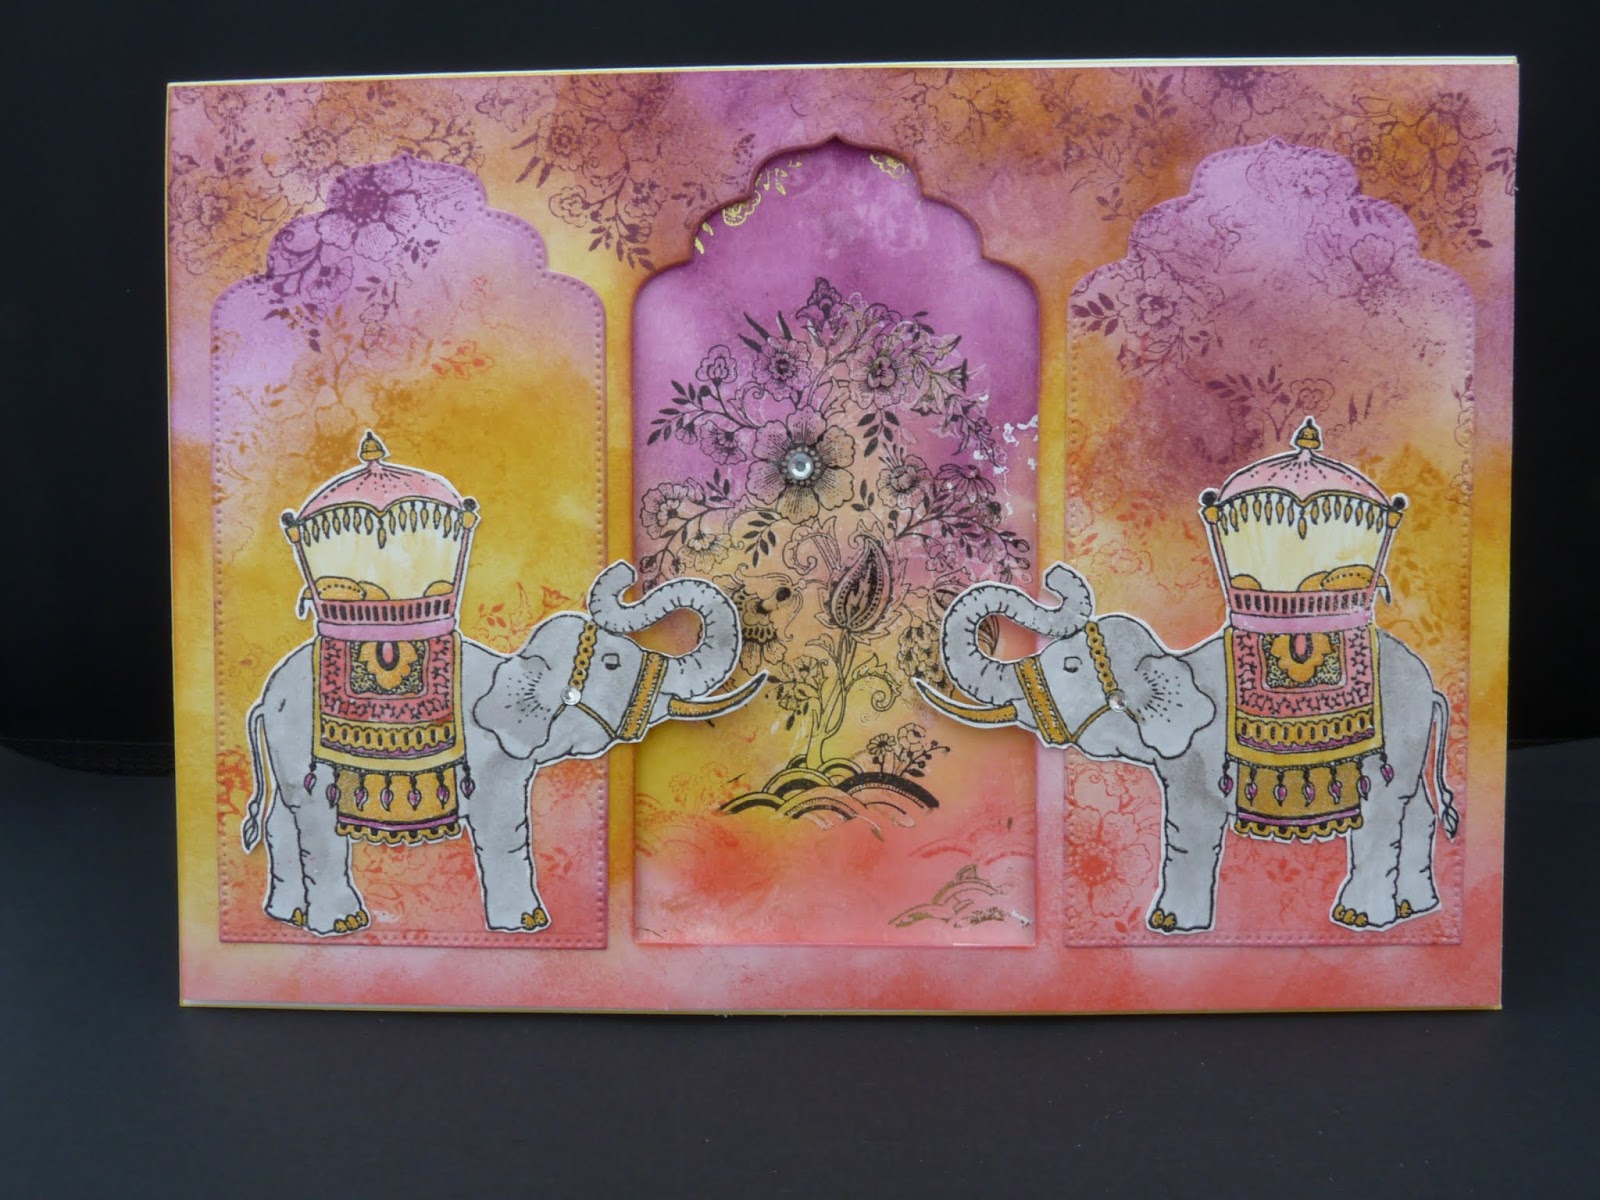
The  shape has been cut from the centre of the egg.
The background card was stamped with Floral Weave.


Hope you have enjoyed my projects this time.
 
Thankyou for visiting.
See you next time.
Carole

Sunday 1 September 2019

Chocolate Baroque card - Country Views cottage


Good morning.

A quick card contribution for today. I like this cottage as it reminds me of my grandma and grandpa, who lived in a thatched cottage for several years.


Chocolate Baroque Stamps used:_ Country Views (cottage, tree background)
 
 
 Stamp the open tree all over the background and leave to dry while you stamp the cottage and cut the ovals around it.
 Lightly add colour to the cottage and stamp the message.
Stamp the tree border so that the ovals sit in the middle.
 
 
Thank you for visiting today.
Bye for now and happy crafting
Carole
 

Monday 5 August 2019

visual image stamps - caterpillar


Hello

Something completely different for me. I saw this stamp by Visual Image stamps, couldn't resist it. So quirky.
 I bought it along with the Cheshire cat, both inspired by the Alice in Wonderland story.


This sample has been stamped onto a wooden oval plaque and uses the words in the set.


I did a background using real ferns and green Versamagic inkpad as this dries well on the wood.
The caterpillar and words were stamped with a Brilliance inkpad and clear embossed. I coloured with watercolour pencils. The caterpillar was then glazed with glossy accents.
I was really pleased with the finished result.


My second version is stamped onto a 15cm.  Artcuts, wooden heart. Again I used real leaves to do the background.
The saying is one I found on the internet which I thought was quite appropriate.

I used a red and a green, sparkly gell pen,  for some of the colouring on this one, to give it a lovely shimmer.

Thank you for visiting and I hope you enjoyed this stamp as much as I have.
There are other characters on the Visual Image website too, but I particularly liked this one.

Bye for now
Carole

Sunday 23 June 2019

One Stamp - Three looks


Hello.

I have three samples for you today using one stamp, which I think is very pretty. It can be used any way around, which makes it look slightly different, so is great for backgrounds.

Stamp used: Chocolate Baroque -  Rose Tree set ( flower spray)
Words are from a Woodware set.


This one has been white embossed onto a Brusho background. The flowers have been further enhanced with the Brusho water colours and a fine brush. The words are from a Woodware set (sorry can't remember what it is called).


My second card has a background stamped several times in black, and the flower spray stamped onto the circle shape and coloured. I've just realized that I took this photo before I had added the message, but it is suitable for all occasions.
I tend to stamp the message onto parchment paper as it gives a soft look and you see the pattern underneath when it is stuck onto the card.


For my third card I used some small hexagon die cut shapes  to make  a spotlight card. I stamped onto the card base first and did the border strip
I lined up the hexagons and stamped again over a scrap piece of paper. These were coloured and then attached over the image on the card.

Hope you like this stamp as much as I do.
Thanks for visiting and bye for now
Carole

Saturday 15 June 2019

Chocolate Baroque 15 minute card - Wise Owl


Hello everyone.

Another fifteen minute card for you today. There are lots of other lovely samples on the Chocolate Baroque site too.  https://chocolatebaroque.blogspot.com/

Like this owl, I think it's very cute.


Stamps used: Take it or Leaf it, Wise owl, Decorative edges.

Stamp the leaves in a circular pattern with a variety of green Distress inks.
Spritz lightly with water so the ink bleeds slightly. and leave to dry while you stamp the owl.
Once stamped, the owl is very quick to cut out. The other alternative would be to stamp the owl directly onto the card, mask it and then put the leaves around.
Stamp the border.

That's all for now.
Please visit again soon and happy crafting.
Carole

Thursday 16 May 2019

Chocolate Baroque 15 minute card -Briar Rose butterfly


Good morning.
It's that time again for another fifteen minute card.
This time I have used Briar Rose Butterfly and a Victorian Velvet Distress inkpad.


Press the inkpad randomly down the card. Then spritz lightly with water and put to one side.
The ink will bleed into the surrounding white space.
Press the inkpad again onto a spare piece of card, dry and then over stamp with  the top of the Briar rose stamp. Do the same for the words.
Cut  out the square.
Dry the card base if necessary and over stamp  with the Briar rose.
Position the square so that it overlaps the same area on the card.

Thankyou for  visiting today.
Happy crafting
Carole

Saturday 16 March 2019

Chocolate Baroque 15 minute card - Sending hugs


Good morning.


Time for another 15 minute card sample today.


I have used stamps from :- Briar Rose Butterfly, Harebell Butterfly and words from Amazing Mackintosh words.
15 x 15 cm. card base
Distress inks - blue print sketch, peacock feathers
Versafine black
Water spritzer

Stamp the bobble spray in a circular pattern around the edge of the white car, using the peacock colour. Do some second generation stamping in the gaps.

Spritz the card with water and put aside to dry. The colour will bleed out to form an interesting background.

Press the blue inkpad onto a small piece of white card. When this has dried, over stamp it with the butterfly section of the harebell stamp.
Stamp the words three times and cut out.
Cut around the butterfly square.
Assemble as shown.

Other 15 minute cards can be seen on Chocolate Baroques design team blog.
Hope you enjoy.
 
Thank you for visiting today and happy crafting
Carole

Thursday 14 March 2019

Chocolate Baroque - Floral Harmony


Hello to you all.

Today I have a sample using the Floral Harmony stamp.
This is a pretty stamp that looks great stamped singly but is also good when masked and multi-stamped as in my sample below.


I like floral stamps that can be stamped in any direction, it makes them much more interesting to use.
The butterfly is from  Patchwork Butterfly.

I used Distress inks to colour the flowers and the butterfly was stamped onto a scrap piece of card that had the same colours on it. It was then stuck onto a black background and cut out.
Words are on the Amazing Mackintosh words set.

Thank you for visiting and happy crafting.
Carole


Monday 25 February 2019

Chocolate Baroque GDT post 3 - February 2019 - Spring Awakening


Hello again.

My final post for this February  GDT  session for Chocolate Baroque. It is a little busier than my first one.


As spring is in the air, or so they say,( it's got to come sometime)
 I have used the pretty Spring Awakening stamp. She is one of the four Season's stamps, all of which I like.


Products used:-  Spring Awakening stamp,  Distress inkpads - lemonade and dusty concord, Versafine - smokey gray, clear embossing powder, black permanent inkpad, parchment paper.
Glossy Accents.
 
The words are made up of a section from one of the sayings in Let's get festive and Essence of Nature.
It is useful to be able to use parts of sayings from different sets. It makes them go further.
 
 
Like the Autumn card I did in my last GDT slot in October, the hair can be inked separately to make a good background. This I did with the Versafine onto a background made with lemonade and dusty concord Distress inkpads.

  The Lady is stamped and embossed, then coloured with the same background colours. Three sections of the primroses were stamped and cut around to make an added feature. A few of the flowers had Glossy Accents put onto them.

I wanted to pick up a little of the violet colour so have mounted it onto a violet coloured card  then the white card base.
The words are stamped with a permanent inkpad onto the parchment and , when this had dried thoroughly, I tore around the relevant words.

Thank you for visiting and I hope you have a good day ahead of you.
Happy crafting
Carole

Monday 18 February 2019

Chocolate Baroque GDT post 2 - February 2019 - Mackintosh Beauty/Exquisite Edges


Hello everyone.
Time for my next post. Where does the time go?

When I was tidying my craft stuff, I use this term loosely, I found a beautiful background piece that I had made with my Brushos. I don't use them very often as my colours are a little bright for my liking generally.
But this piece was crying out to be used.
 I have teamed it up with an image from one of my other favourite sets the Mackintosh Beauty.


I have used her in one of my previous GDT posts, in fact exactly a year ago, but because you can snip away various parts of the design she can look different each time you use her. I like this versatility in a stamp.


Products used:-
Stamps - Exquisite Edges, Mackintosh Beauty, tiny butterflies from the Essence of Nature
words from Loving Sentiments

Brushos,  VersaMark, clear embossing powder, Versamagic Aloe Vera, Majestic Blue Versafine, black Staz-on inkpad, parchment paper.


I stamped the background with Versamagic  and clear embossed it.
I used a paint brush to wet the inside of all the flower shapes and then lightly sprinkled a blue Brusho over. The water tends to be contained within the embossed areas so the colour doesn't spread  too far and the splatters spread into the sky area. The colour was spread through the petals with a fine brush.

I left this to dry and then coloured the lower section with the Aloe Vera  inkpad.

The lady and tiny butterflies are stamped with the blue Versafine and clear embossed.  Her dress was then trimmed and coloured with the same colours as the background.
The words are stamped with the Stazon ( permanent inkpad) , onto the parchment paper.

It was a little time consuming to cut the butterflies out but I  thought they were cute.
 
Thank you for visiting today and I hope you have enjoyed my project.
It is always a pleasure creating projects with such beautiful stamps as these.

 
Bye for now and happy crafting
Carole


Saturday 16 February 2019

Chocolate Baroque 15 minute card - Dawn Chorus


Dawn Chorus

Hello.
It's 15 minute card time again on Chocolate Baroque.

This is my contribution for this month.


Stamps used:
Dawn Chorus
Fly Away with me
Wise Owl

 The background was created  with Abandoned coral and  Fossilized amber Distress inks and then over stamped  using various elements from the three sets.

The Dawn Chorus image was stamped with black Versafine.
Hope you will visit the blog to see other DT members 15 minute creations.
 
Thanks for visiting
Carole

Monday 11 February 2019

Chocolate Baroque GDT post 1 - February 2019 - Poppy Meadow


Poppy Congratulations

Good morning everyone.

I am back again as a guest design team member for Chocolate Baroque, this being my first of three posts during February.

I have used the beautiful poppy stamp from Poppy Meadow and the centre of Song Thrush. It is relatively quick to make too.


Products used:-  Poppy Meadow, Song Thrush, word from Loving sentiments stamps, Versafine Black and Majestic blue inkpads, Artcuts  wooden heart, white acrylic paint, watercolour pencils, DL card base.
 
 
The poppy has been stamped with Versafine black and clear  embossed to fit onto a DL card base. 
I have used a  heart shape as the central element.
As my shape was wood and I wanted the blue to be crisp and clear, I painted it with slightly watered down, white acrylic paint.
When dry, the centre of the Song Thrush stamp was inked with Blue Versafine  and the heart was placed over the section I wanted to stamp.
 
All the colouring has been done with water colour pencils.
For the top and bottom edges I drew a line using the same blue as the rest of the card . Then I pulled a damp wipe along the edge to smudge and soften it slightly.
 
The joy of the poppy stamps is that you can colour them almost any colour you like. This shape reminded me of the blue Icelandic poppies.
Hope you have enjoyed my post and see you next week with my second project.
 
Thank you for visiting and happy crafting
Carole

Tuesday 15 January 2019

Chocolate Baroque 15 minute card - Harebell Butterfly


Hello to you all.

!5 minute card time again on the Chocolate Baroque blog.

My card uses the lovely stamps on the Harebell Butterfly set and words from Loving Sentiments.


I like these colours together and thought this would be good as a man's card, especially if they were a gardener.
 
I have used a Pumice Stone Distress inkpad and dabbed it along   a masked area of the card and then over stamped it with the same colour.
The mask was then removed and the main image was stamped with black. The flower heads were coloured with pencils in a muted pink and green.
 
Hope you enjoy the rest of the Design team samples on the blog.
Happy Crafting.
Carole