Friday 22 December 2017

Chocolate Baroque Christmas

Hi everyone.

This is the last of my Christmas cards for this year. Hope you enjoy.


The background of this was done with Brushos and when dry, over-stamped with the baubles  and the corners, which were then embossed.  I then cut an aperture and mounted it onto a white card base  with a slightly smaller aperture.
The message is mounted onto the inside of the card.


The robins have their decs. too. They are the same baubles as the previous card but cut out and raised slightly when mounted.


This was one of my favourite cards I made. I made a Distress ink background, stamped and embossed the scene and added some silver foiling. It was much prettier than the photo shows.
 
Anyhow, wishing you all a very happy Christmas and a happy 2018.
Best wishes
Carole

Friday 15 December 2017

Chocolate Baroque 15 minute card - New England Winter

Chocolate baroque 15 min. cards

Hello .
Today I have a card made with the lovely cone stamp from the New England Winter set of stamps.
This is a great image, that can be used in many ways, as you may have seen in my last blog post.


Ideal for  making last minute cards.

Simply stamp the cones facing each other, leaving a gap between them, so you can overlay the third image that has been stamped onto a circle of card. I tend to stamp the image first and then cut it out. . Layer this onto  red card or go around the edge with a red pen
 Add a strip of red card or ribbon and stamp a message.

You can put anything into the centre , another image or message, to make a crisp clean card.

                          Wishing you all a lovely Christmas and a very happy 2018

                                                                   Best wishes
                                                                      Carole

Sunday 10 December 2017

Chocolate Baroque Christmas


Hello again and welcome to my blog.

As promised last time , I have two more Christmas cards for you to see.


This was one of my favourites as it was relatively quick and easy to do.
The background was done with Distress inks  and when dry, over-stamped with  the cones. I stamped the cones around the edge of the red card with VersaMark and clear embossed them.

Stamps used: New England Winter (fir cones)
                      Festive words


This time some of the cones are clear embossed and some white embossed. This gives a slightly different look to them.
The background was then done with Brushos, which I am  warming to, having had them for a while and not really used them much.
Wipe over with a dry cloth to remove ink from the surface of the embossed areas.

Hope you have enjoyed looking.

Please look in again at the end of next week, to see another card made with this stamp . An entry for the 15minute card ,blog post, on Chocolate Baroque.

                                                                        Bye for now
                                                                            Carole


Thursday 7 December 2017


Chocolate Baroque Christmas cards

Hello to anyone reading my blog.

Now that we are into December I am willing to 'throw' myself into Christmas preparations and as usual , will be trying  to get my Christmas cards completed and sent!

I did have a bit of a head start with ideas,  as I did some samples for Chocolate Baroque for a Hochanda show in August. Far too early for me to be thinking about Christmas, but I understand why it has to be done.
Once these were done I put Christmas on the back burner again, so I'm still behind with my cards. No change there then.

So today I thought I would show you a couple of the cards I made for the show.


It had to be a heart shape with this saying. Although this heart is cut from card, the design fits onto a 15cm.  wooden Artcuts heart and makes a lovely wall hanging .
Stamps used: New England Winter (house)
                       Reindeer Landscape (silver decorations)
                       Let's Go Festive (words)


My second card uses a tree design stamped in a circle. I think it makes a lovely star design. It is silver embossed onto a craft card and the edging is silver embossing powder too.

Stamps used: New England Winter (tree)
                       Lets Go Festive words

                      Thanks for visiting. I'll post some more Christmas cards soon, hopefully.
                                                                     Bye for now
                                                                         Carole

Thursday 16 November 2017

Chocolate Baroque 15 minute card - Floribunda Net


Floribunda Net -  15 minute card

Hello everyone.
Today I have another 15 minute card to show you that is very simple to do, but very effective , I think.

I really like black and white cards and  you can always add a little touch of colour to them, if you wish.


Stamps used: Floribunda Net
Words on the  Loving Sentiments set
Versafine onyx black inkpad
White and black card

I stamped  the rose several times onto  white card and trimmed it up to fit a square card blank. Instead of matting it onto black I used a fine black pen and drew lines around the edge, to give the appearance of layering.

I stamped it out again and cut around the top section and tore around the bottom, netted section.
This has been mounted onto black, which has then been torn into shape.
Lastly I added the words.

The black and white gives a lovely crisp look to your card, but any monochrome would look good too.

Thank you for visiting today and I hope you enjoy the Chocolate Baroque show on Hochanda on the 20th November.

                                                                  Bye for now
                                                                       Carole

Wednesday 1 November 2017


Laurel Burch Card

Hello, hope you are all well.
This is just a quick posting to show you another Laurel Burch card .

Not one that I have made, but a gorgeous card that I received for my birthday recently,
from a very good friend who is also a Laurel Burch fan.


Chris  really makes her colouring come alive and this is no exception.
This is a great stamp that Chris used, mind you, there are not many of the Laurel Burch designs that I don't like !
Many of my Christmas cards will be featuring a gorgeous Christmas cat stamp.

Must get some colouring lessons.  Love it :) .


                                                           Bye for now
                                                                Carole


Monday 16 October 2017

Chocolate Baroque 15 minute card - Baroque Corner


Baroque Corners 15 minute card - Baroque Corner

Hello everyone. Hope life is treating you well.

Today I have a quick make to show you using the beautiful Baroque Corner stamp


Stamp the large design from the  Baroque corners  and trim  down to a 12cm x 12cm. square. ( 4.75 inches)

Slice across the centre of the design  and mount onto a 14 x 14 cm. piece of  black card, leaving a  1cm. gap for the words. ( Amazing Mackintosh Words)

Mount onto  a 15cm. x 15 cm. card blank. ( 6 inches).
 
The card below is the same design in a different colourway. Still prefer the black and white version.


Thank you for visiting and I hope you will give this very simple project a go.

These corners are really beautiful for building up patterns, as you may have seen from one of my previous posts.

                                                                          Bye for now
                                                                              Carole

Friday 6 October 2017

Chocolate Baroque samples


Hello everyone.
Welcome to my blog.

Today I would like to show you some more of my Hochanda samples that I did.

I used the stamps from the Take It or Leaf It  set.  They are great for backgrounds but are also good as the main images.


This leaf spray is great for backgrounds but it also makes a lovely little wreath shape when stamped in a spiral.
The flowers are from the Floral Harmony set.


This is a fairly quick and easy card as the leaves are very easy to cut around.

I made a piece of background paper with Distress inks and then stamped the  leaves and flower heads with black Versafine.

Thank you for visiting.
Happy crafting
Carole 

Monday 18 September 2017

Chocolate Baroque 15 minute card - Harlequin Rose


Harlequin Rose 15 minute card for Chocolate Baroque


I have had this stamp set for a long while and I still think the  images are great.
 I made this as a wedding card for a friend.

Stamps used: Harlequin Rose set
Clear or white embossing powder
Distress ink : raspberry

I stamped the image with a clean VersaMark ink pad and clear embossed it. You can use white  embossing powder too, although I always feel it has a slightly softer look using the clear. Personal preference.
Stamp and emboss the large border in the same way.

Colour the background using cut-n-dry foam, making it darker on the rose head and around the edges.

The congratulations is a peel off that I found in my stash. Haven't used those in a while, I was quite surprised that it was still sticky!
 
Thank you for visiting and have a great day.
Happy crafting
Carole

Wednesday 30 August 2017

Chocolate Baroque samples for Hochanda July 2017


Hello everyone.

Thank you for visiting my blog.

As Lesley, from Chocolate Baroque, has been doing regular shows on Hochanda, I have been lucky enough to have some of my cards shown, that I made as a Guest Design team member.
I was so excited to see them on television.

The card samples for the shows have been amazing. I find it really interesting to see how all the design team use the stamps in different ways.

I thought that I would share a couple of my samples from the first show I was involved with.
What gorgeous stamps we had to "play" with too.


My first sample has been made with the beautiful  Baroque Corners. These are great for building up different patterns, as well as creating stylish corners. There are two different sizes of the same pattern and a multitude of combinations can be created with them. Love these :)
There are some great samples from the design team members on the website blog posts , using a variety of colour combinations.

Watch out on Chocolate Baroque's 15 minute cards blog, next month, to see a very quick and simple idea using the large corner.


My second card has been made with the Hanging Flower stamp. The background is Distress ink , over stamped with the image and the flowers coloured with the same ink.
The words are from Amazing Mackintosh words.
 
This is a beautiful stamp and I actually have similar plants growing in my garden..
 
 
They have the most beautiful centres, as you can see from the photo.


   The samples from the design team come in various colours and all look lovely. Several samples have been posted on the CB. site and their facebook page.
 
Thank you for visiting and I shall post some more samples soon.
Happy Crafting
Carole  :)

Wednesday 23 August 2017

Guest Designer - Chocolate Baroque card 3


Morning All
This is my final post, for this period, as a guest designer for Chocolate Baroque.
I have thoroughly enjoyed doing so much stamping again and creating cards for this.


Stamps used: SummerFair
                      Floral Weave
                      Harlequin Rose - words
 Distress inkpad: Tumbled Glass
Versa magic: Grapefruit.
Versafine: Onyx black
Clear embossing powder
Watercolour pencils
Card and parchment paper
Glossy Accents
Spray mount


I make no apologies for using Summer Fair , even though it has been highlighted a lot recently, by Lesley on Hochanda and lovely samples from other members of the design team.

It is such a beautiful image .
I have stamped and clear embossed her onto a parchment paper. This gives a lovely delicate feel to the image.
Working on the back, I have highlighted some of the strands of hair and the poppy centres. This looks white on the front. The rest has been coloured with water colour pencils, on the back of the image.
I tore around the image, pulling the paper upwards , with the right side facing me. This gives a white edge where the parchment has been torn.

The background has been done with the technique of 'smooching' the inkpads onto a craft sheet, spritzing with water and lifting the colour off.
When dry, I trimmed it to size and over-stamped with the Floral Weave. There are also a couple of tiny, light blue butterflies in the background and these were done by inking tiny wooden butterflies and using them as mini stamps.
When this was dry I stuck Summer Fair on with spray mount. I shaped the parchment slightly before I pressed the edges down so she is slightly raised , rather than flat.

 Finally, the message was stamped onto a circle, coloured around the edge and glazed with Glossy Accents.

Thank you for visiting today and I hope you have enjoyed my projects over the last three weeks.
Look forward to showing you more next time around, but watch this space as I have some to show from the recent Hochanda shows too.


Happy crafting
Carole

Wednesday 16 August 2017

Guest Designer - Chocolate Baroque Card 2


 Chocolate Baroque card 2


Hello Everyone.
Welcome to my blog.

Today I have another card as a guest designer for Chocolate Baroque.


I have used  two of the same stamps from my previous sample as well as the beautiful Song Thrush panel. I like this panel  as you can use various parts of it as well as the whole stamp.


Stamps used:  The border from Harlequin Rose, words from  Summer Poppies, Garden Lace Scene and the  Song Thrush panel.
VersaMark embossing pad
Versafine  Onyx black inkpad
Silver embossing powder
Mica powders
Glossy Accents
Distress ink - Peacock Feathers


I  stamped and silver embossed the panel  onto black card  and coloured with mica powders.  Then the whole scene was glazed with Glossy Accents. Although this takes a while to do the whole panel, it  is a technique I really like on black, as it gives a very dramatic effect and looks as though it has been enamelled.
The border was stamped and silver embossed onto white card and then coloured with the Distress ink.

 I then discovered, by accident, that the panel sat nicely into the border of the Garden Lace Scene , so I decided to use that as part of the background too.  I stamped  the Garden Lace Scene  so that it was balanced with the border and then trimmed the card  up. The panel then sat evenly balanced along the border. The words are from the Summer Poppies set and stamped with the black Versafine.

                          Hope you have enjoyed your visit and see you next week for my last sample.
                                                                              Happy crafting
                                                                                     Carole


Wednesday 9 August 2017

Guest Designer - Chocolate Baroque Card 1


Hello and welcome to my blog.

I am delighted to have been asked to become a guest designer for Chocolate Baroque, recently.
It's great, as I have liked and used their stamps for many years now and they never fail to please.

So, here goes. This is my first post out of three. Hope you like it.


Stamps used: Garden Lace Scene
Harlequin Rose border
Summer Poppies - words
Distress inkpads: Evergreen Bough
Cracked Pistachio
Red Brick
VersaMark inkpad
Clear embossing powder
Versafine inkpad : Onyx black
Embellishments: swirl die ( think it was a Marianne)
Flowers: handmade from a circle shape.
Wink of Stella clear pen
Spray mount
 
 I stamped  the border with a  VersaMark inkpad , onto white card, and clear embossed it.
The scene was then stamped alongside it with Versafine black and left to dry thoroughly.
The background can be done with Cut-n-dry foam or brushes, whichever method you prefer with the Distress inks.
I then coloured the scene with the inks too and pulled out with a Wink of Stella pen to add light shimmer. This is difficult to see in the photo.
 
The words were stamped onto a piece of vellum parchment paper and clear embossed.
You could use StazOn ink to do this, then it would not need embossing. I like to stamp words onto vellum as it gives a lovely soft effect.
When dry, tear or cut around the edge of the parchment. This was stuck on with spray mount.
 
Finally the embellishments. Cut the swirl as many times as required and make three flowers  out of ordinary white copy paper. I made these from small circles, cut in a spiral and folded around. This  makes a lovely, rose type, flower.
 
Thank you for visiting my blog and I  hope you enjoyed my project.
I will be showing another card next week, using the lovely Song Thrush stamp.
 
Happy crafting
Carole


Sunday 23 July 2017

A card for a man


Hello.
Just a very quick post as I have not done anything on my blog for ages.

I have been very busy stamping and having lots of fun as I had a lovely surprise recently.
Watch this space.

 I made a card for my brother- in- law recently and it's the first man's card I have made for ages.
It really made a change. As he lives in London the image was very appropriate too.


I was looking in my box of bits, I have one suitable for male and one for female cards, and found this lovely Crafty Individuals image and an embossed metal piece which had been coloured with alcohol inks. This must have been done an age ago as I haven't touched them for a while. Must get them and the metal out again!

I used the same embossing folder on the card and scuffed it. Then, as you can see , it was just layered up with coordinating colours.
Quick and easy and I was quite pleased with the way it all went together. Did help that I had the main pieces already made of course.

Must dash.
Happy crafting
Carole


Tuesday 27 June 2017

Harlequin Rose


Hello and welcome.

One of my favourite stamp sets that I have used so many times, and never tire of, is Harlequin Rose by Chocolate Baroque.
The roses are such lovely images and can be used for all occasions.

I would like to share a card I made recently for my mum, using the largest image in the set. So quick and easy, but always lovely results. The image does all the work.


Stamps used: Exquisite Edges for the background, Harlequin Rose.
The die cut was a freebie someone gave me (don't know the co.) but cuts beautifully.

 
 Thank you for visiting.
Happy Crafting
Carole

Thursday 15 June 2017

Paperbabe challenge 49 Sketch


Hello to anyone reading my blog and thank you for visiting.

I decided to join in with a Paperbabe sketch  challenge this week, as I have the gorgeous fairy stamps designed by Chris Dark.

Never tried a sketch challenge before so thought I'd give it a go, although this particular one finishes on the 16th ( tomorrow!). Last minute, as usual!
Anyhow, hope you like my contribution.


The fairy was stamped onto a Distress ink background and the skirt was paper pieced. This is a good method for me as I am not particularly good with colouring.
Not sure how true to the sketch you have to be, but I'm submitting it anyway.


Happy crafting everyone.
Bye for now
Carole
 

Tuesday 6 June 2017

Chocolate Baroque Challenge 35 - Purple and green


Hello everyone.
Hope your day is a little better than it is here at the moment. Mind you, it's a good day for            
    crafting! :)

I've been attempting to tidy and sort my craft stuff so that my daughter can get into the room to sleep.
This is by no means an easy task ,although I have found a number of things I had forgotten I had, which is always exciting!
I also found a number of projects I had started, one being a beautiful butterfly that just happened to be the right colours for the challenge.
This inspired me to put in another entry,
as it is the end of an era and the last challenge that Chocolate Baroque are doing at the moment.

 
So here are the gorgeous colours again and my second card.


Products I have used: Stamps from
Patchwork Butterflies
Floral Weave and words from Fantastic Florals
Distress inks, Versamagic and Brilliance.
Mica powders
 
Have a good day and thanks for visiting.
Bye for now
Carole
 

Sunday 28 May 2017

Chocolate Baroque Challenge 35 - Patchwork Butterfly - purple and green


Hello
Welcome to my blog.


Challenge 35, with beautiful colours as usual, and what a gorgeous photo.


It is a sad day as this will be the last Chocolate Baroque challenge. A shame, as the challenges keep me focused on my stamping. I am going to have to be very much more disciplined and try to use my lovely stamps more often. It won't stop me visiting the site though to look at the DT's lovely samples and drool over the new stamps that become available.


I have used the Patchwork Butterfly, which is still one of my favourite sets. I love the jumbo butterfly and was very glad that it was a set highlighted by Lesley, on Hochanda recently.  They are stamped onto Chiyogami paper and sections coloured with Versamagic inkpads. Then I stuck them onto purple card  and cut them out.

The background has the flowers from Fleurs Nouveau, which were stamped directly onto a 16cm. white painted  frame.


A stencil was used to add texture to the top, right hand corner.


Thank you for visiting.
Happy crafting
Carole


Friday 5 May 2017


 Chocolate Baroque Challenge 34

Hello.
 I thought it was about time that I did another challenge post, haven't done one for ages.


Current Challenge
 
How pretty are these colours and the sample card is  beautiful.


I

I recently bought a stamp called Serena, having looked at it numerous times. I'm very glad I did now as I have several ideas for projects.


  This is the  card I am entering into the challenge.


Although the stamp is a Christmas one it is possible to use elements of it, which is what I like .

She fitted beautifully onto a 12cm. Artcuts heart and I was able to leave off the candles, therefore making her suitable for any occasion.
The background stamp is from Floral Edges, another set that I am fond of, and the words are from a Hobby Art set called Sunny Day Greetings.


I used watercolour pencils to colour the image and pulled the colour out with a clear Wink of Stella pen.
It doesn't show very clearly in the photo but it is very pretty and shimmery in real life.
The background is done with Distress ink.
 
Hope you are all having good crafting.
 
I am up at Ragley Hall next weekend with Artcuts, at the Handmade Fair.
 
If you are visiting please come and say hello.
Bye for now.
Carole


Friday 7 April 2017

Paperbabe Fairies 2


Hello again.

Well, I really got carried away with these Paperbabe stamps. I haven't done so much stamping in a long time.
I've had great fun with them. So, here are two more samples using the Butterfly fairy and the Musical fairy, as promised.


The Distress ink background is ideal  for the lovely Butterfly fairy and so simple to do. I stamped the fairy directly onto the background and then re-stamped her face onto white, cut it out and overlaid it.
Then I added a little more colour to the dress.

.


       I did exactly the same with this one, but  I cut her dress from the Chiyogami paper again.
             The flowers have been heat embossed with white powder.

Hope you enjoyed all the lovely samples on the blog hop and thank you for visiting my blog again.
Thank you also for your lovely comments, they are very much appreciated.

Next time I have a mixed media project to show you.
Bye for now
Carole


Friday 31 March 2017

Paperbabe new stamp release


Hello to anyone reading my blog and welcome.

I was very pleased and excited to be asked, by my friend Chris, if I would do some samples for the launch of her stamps she designed for Paperbabe.
Please read the information below and view the blog  hop.


We are very excited to announce a guest artist in the Paperbabe Stamps family and to celebrate we are having a little blog hop...

The very talented Chris Dark has designed a collection of beautiful Garden Fairies Stamps, the Butterfly Catcher, Butterfly Emerges, Butterfly Fairy, and Musical fairy, they are a larger set and each includes a beautiful sentiment.


To add extra fun to our blog hop... we are offering up a prize! 
of the whole garden fairies collection to one lucky winner.

Here are the details:
  • A winner will be chosen at RANDOM from any of the designer's blogs and the PaperbabeStamps Blog to win.
  • Just leave a comment on any of the designer's blogs listed below or the Paperbabe stamps blog for your chance to win! (you do not need to comment on all blogs to qualify but it increases your chances) 
  • Deadline: You have until midnight on Sunday, 2nd April to leave a comment.
  • Please check the Paperbabe Stamps blog on Wednesday, 5th April to see if you are one of our lucky winners.
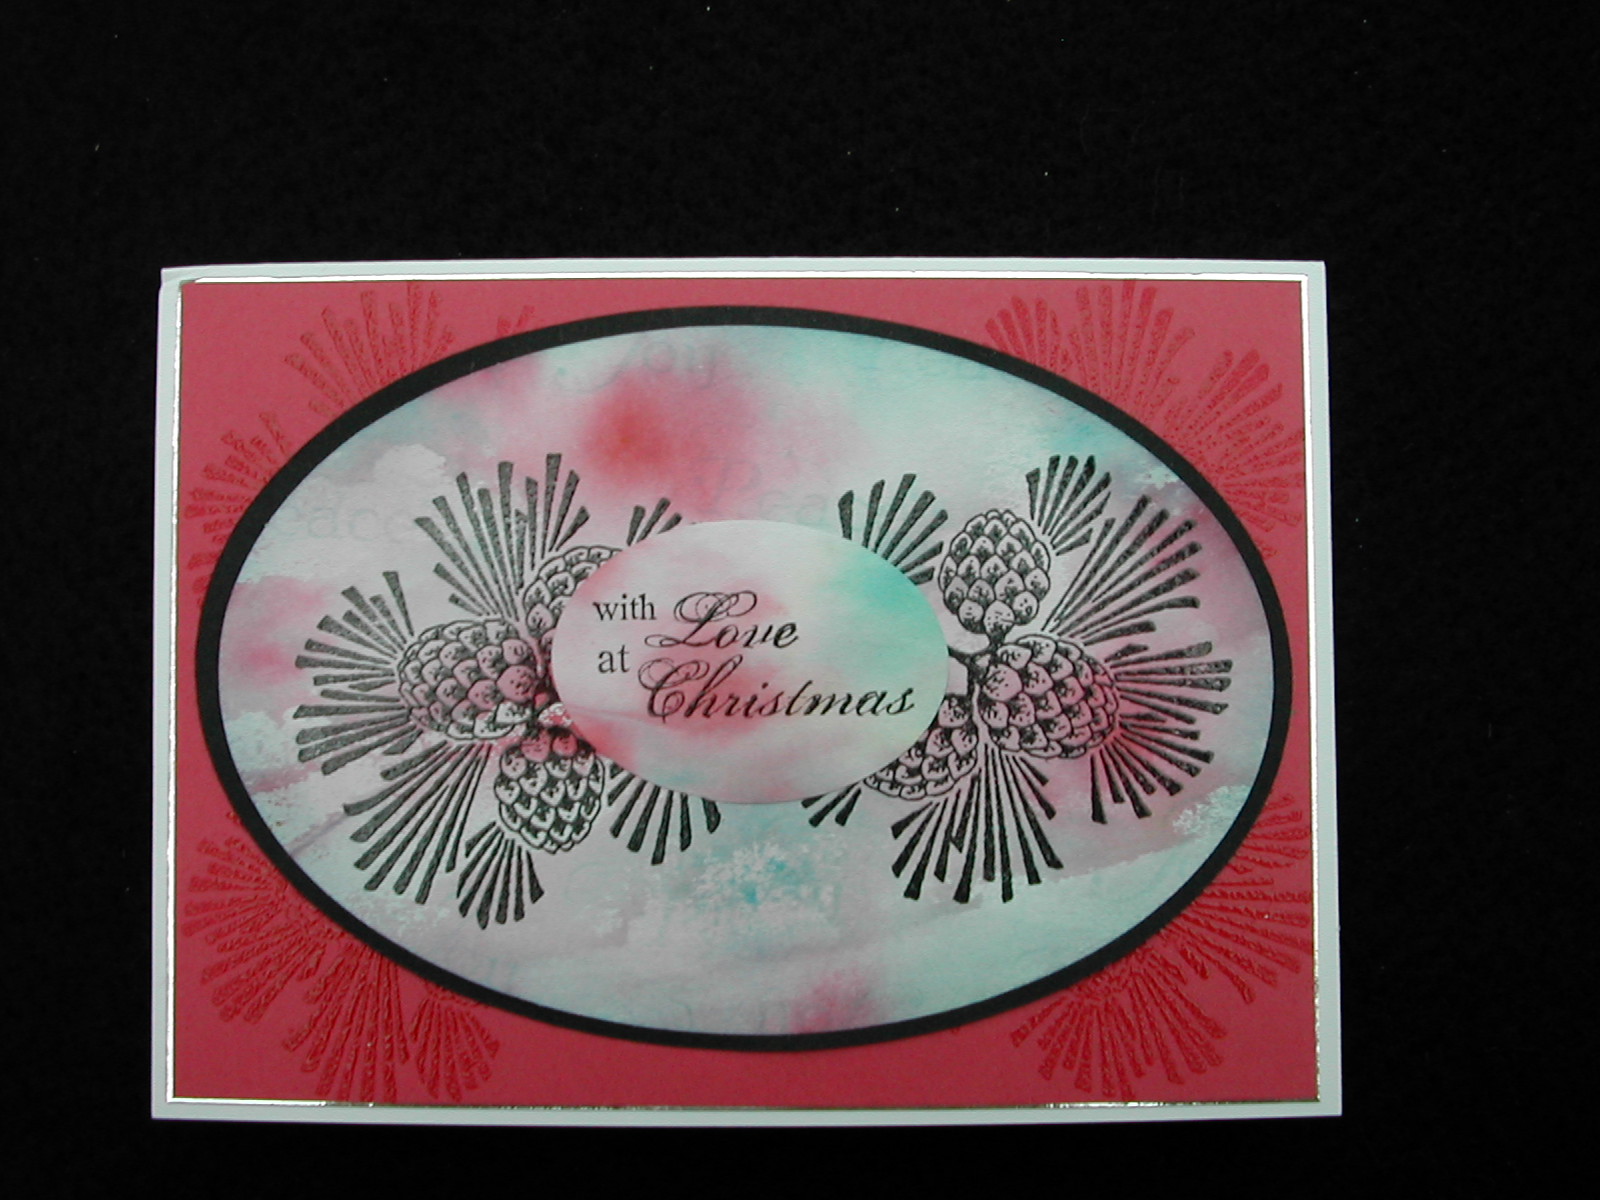
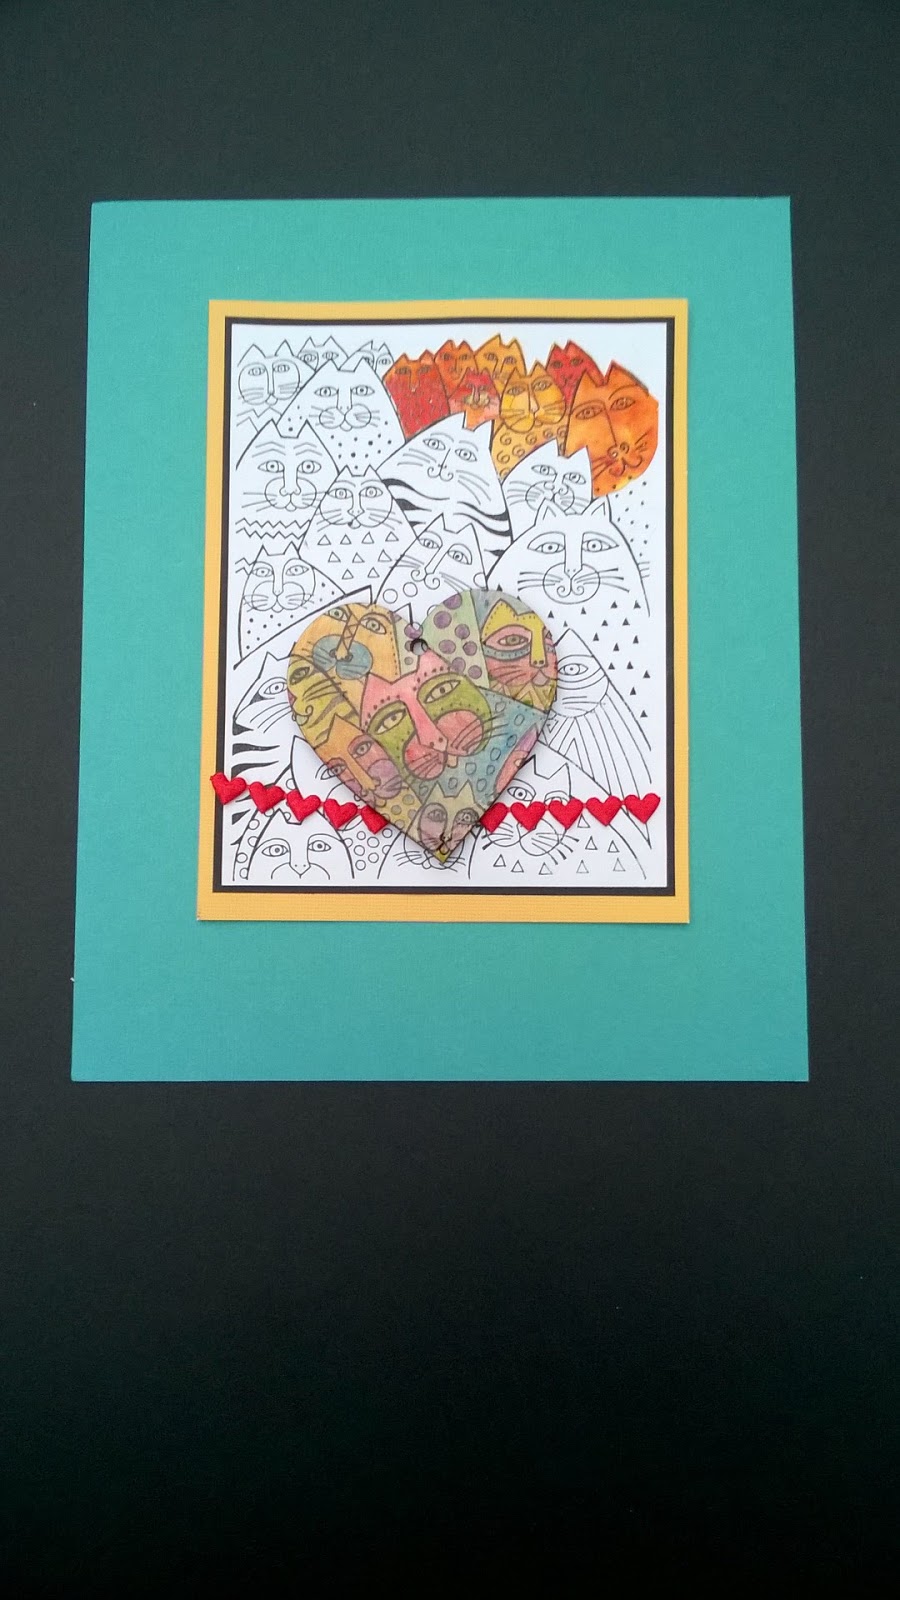
Here's a sample from me...


Today, we’ve enlisted some super talented designers to inspire you with ideas on how to use these beautiful new garden fairies! Hop along for lots of fun and inspiration! 
Carole C  ( Me)

Have fun on the HOP!


I think the fairies are very pretty, not normally my thing, but when I first saw the designs I had ideas immediately popping into my mind, as to what I could do with them.

 The two fairies I worked with are Musical fairy  and Butterfly fairy, and I think both of them would  make really pretty Christmas cards, as well as general greeting cards.
 They are also a great size for using on home décor pieces, as you can see from a couple of my samples.

I started by doing a variety of background pieces with Distress inks . Haven't used these in a while.
As I am not brilliant at colouring, I have paper pieced some of the dresses using Artcuts Chiyogami papers and coordinated the backgrounds with the colour of the papers. This worked well, particularly for the Musical fairy, as her dress was much easier to cut out.


The little wooden flowers are from Artcuts and coordinate well with the flowers on the paper.
The tiny flower stamps , with the fairy, made perfect centres for the flowers.


         This time she  has been stamped onto a 15cm. wooden heart (Artcuts) . 
The fairy's hair makes a great hanging, vine like, border too. 
 
 
The lovely Butterfly fairy below has been stamped and cut out. A bit fiddly! I like the little butterfly bag , so decided to stamp several of them and cut them out, to fly. Again, the background is made with Distress inks, weathered wood, sage and stormy sky.


Parts of her hair, dress and wings have been foiled and  I made the flower from white muslin.

Lastly, I have another home décor project.
I do like stamps that can be adapted slightly to give a different look, hence the fairy, minus wings.
Again, she has been stamped and cut out, as she fitted well on the 14cm. frame that I had. She has been coloured with Brilliance and VersaMagic ink pads.


I have had great fun using these stamps and I hope that you will too.
I have some more samples to show and I will post those soon.
Please visit again to see a few more ideas..
 
Happy blog hopping and thank you for your visit.
Carole

Tuesday 28 March 2017

Stampendous - Laurel Burch 3


Good Morning.

More Laurel Burch stamp projects I have been working on.
One quick and simple and the other on a 12cm.  Artcuts heart.


The image has been heat embossed with Jewelled gold powder and coloured with pearlescent paints. The paper was some I found in my stash and I thought the tiny image worked well.


The image on the heart has been coloured with the same paints and then I put glossy accents over the face and birds. Not the best photo, looks washed out! But you get the idea.


The  background on the card is a Creative Expressions - Sue Wilson Die which was a recent purchase and I'm loving it! The other die cuts were a freebie and I can't remember what make they are, but they cut brilliantly.
 
Thank you for visiting.
Carole


Sunday 19 March 2017

Stampendous - Laurel Burch designs


More Stampendous Laurel Burch designs


Hello.
Where does time go? I can't believe that it is over a month since my last post!
Hope you are all well.

I have been enjoying  my new Stampendous stamps as I really love these Laurel Burch designs and all her art work.

After getting excited by the single cat with bird, I have since tried the cat background and lady.
Here are a few of the cards I have made already.


                                    Love this background stamp, with all the happy little faces!


Laurel Burch's work was very distinctive because of the very bright colours she used on her designs.

 
This one has been mounted onto a Brusho background.


The Lady's  head is called Soul Tears.

The sample below was stamped and silver embossed onto a 15cm. Artcuts  heart, which was painted black. I wanted to colour her with pearlescent colours, so not quite as vibrant as the other sample, but I was pleased with how it turned out.


Hope you have enjoyed these projects and thank you for visiting.
Must finish now.
Happy crafting
Bye.
Carole