Tuesday 24 December 2013

Christmas eve post

Hello everyone.
Seasons Greetings
 
A few more cards that I sent this year.
It's the first time for several years that I actually managed to make all my Christmas cards. Normally it is left to the last minute and I only get a few handmade ones completed.
 
Little Claire stamp

 
 These two cards were made with some material, patchwork panels I bought. They were mounted onto stiff card before  being put onto the cards.


Woodware robin stamp
 
Have a great time.
Carole

Sunday 22 December 2013

Three more owl cards


A few more owl cards using the lovely stamp from my last post.


Quick and easy stamping !
 
Carole


Sunday 15 December 2013

One owl stamp, three designs

A favourite owl stamp

Hello everyone.


I make no apologies that on the samples I have posted today, I have used one of my favourite owl stamps that I have had for years.
 It is an old Santa Rosa stamp but I think the image is beautiful.
Below are three designs that I have done recently.
Hope you like them.


The image is just stamped and embossed and the background inked lightly.
 
I have used this stamp so many times but still think it's great.
It  has been brilliant for male and female cards, as well as Christmas cards.
 
Thank you for looking.
 
Carole


Monday 18 November 2013

Christmas decorations

Artcuts Christmas decorations


The Artcuts wooden decorations are great to work with. They can be sanded to give a lovely smooth surface for stamping, or coloured with stains or acrylic paint to give a coloured surface to work on.

The bird has been painted with Paper Artsy chalk paints and then over-stamped with a Chocolate Baroque stamp and blue Versafine  inkpad. When this was dry it was painted with PVA glue and a clear glitter sprinkled over it.
 
 
The bell was coloured around the edges  and then glittered in the same way.
Four small hearts were then stuck on and a flower centre finished it off.


The gingerbread man was just glittered straight over the laser burnt side so that the burnt edges showed through , underneath the glitter.
This is one of my favourite techniques as I like to see  the natural wood with the burn marks.


These  have been stamped with Versafine and clear embossed. They were then coloured with water colour pencils. The moon was glazed with Glossy accents and glitter sprinkled over.
Little Claire stamp called Little George


Little Claire stamp


The bauble has been stamped in the same way as the owls and then each section was glued and glittered. This was time consuming but pretty when done.

 
Artistic bauble stamp by Chocolate Baroque
Stamps by Chocolate Baroque
 
These were coloured with Versamagic inkpads. They give a lovely matt finish, which I like.
 
  Hope you have enjoyed the projects and thank you for visiting my blog.
 
 
Happy crafting
 
Carole


Saturday 9 November 2013

A parliament of owls

A Parliament of owls
 
This is a favourite project of mine.
 
I have a great love for anything owl related as I mentioned in my profile.
 
 This was a project I did a while back but I still enjoy looking at it every day.
It incorporates some metal embossing as well as stamping and using Dreamweaver stencils.
 The large Dreamweaver owl was done with Ferro paste, which gives a lovely rough texture with a slight shimmer. The two small owls were done with black matt embossing  paste.
The little owls look so feisty sitting on the branch, I find them amusing.


 The owl stamps are from Crafty Individuals and Katzelkraft and the tree is a P.I. stamp, stamped onto acetate. 
 
 The trees are difficult to see in the bottom left and right corners, but the acetate is curved and tucked into the window, to give it a bit more dimension.


 The font used for the writing is called Lingfield by Go Create.
 
 
All the products used were from The Craft Barn.
 
 
Update.
 I was lucky enough to teach this project again to a lovely group of ladies who visited the Craft Barn in July.
As  some of the products are not sold there now , I adapted the  design slightly with other owl and tree dies. Stupidly , I didn't take a photo of the variations!
 
Hope you have enjoyed looking and thanks for visiting.
 
Carole


Tuesday 5 November 2013

Owls
 
"When was the last time you did SOMETHING for the first time?"
I love this quote!
 
I can't tell you the source I'm afraid, as I can't remember where I saw it.
 
But I decided that for my birthday each year I would do exactly that. Do something I had never done before and would like to try.!
 
Last year my family bought me a rally driving experience, which was great fun. My father always used to joke that I should be a rally driver. Can't imagine why!!!
Just as well that I didn't take it up though as I proved to be rubbish, but it was great fun and the instructor was VERY patient.
 
This year I wanted to go gliding but then I found something that appealed much more. Gliding can wait until another time.
 
 
SO I went on an OWL PHOTOGRAPHY session
 at The Hawking centre in Kent.
 I was in my element!!!
 
I mentioned in my profile that I like owl related things. Well this was an amazing experience.

These are a few of the  photos that I took of the beautiful Great Grey Owl. What a majestic creature. It was perfectly relaxed and 'what a poser!'


I took hundreds of photos  . Didn't quite master the flying  ones but I'll just have to go back and have another practise!!
Thanks for stopping by.
 
Some owl related crafting to follow.
 
Carole x


Monday 28 October 2013

Metal embossing


Hello again.

Thank you for visiting my blog.


Just realised how long ago it was that I posted a project.  OOps!!
Sorry about that.

Today I have a couple of cards that I made using embossed metal . The metal elements are bookmarks, so they are gifts and cards in one.

 Using metal on my cards and other projects is one of my favourite techniques.


The metal has been embossed using a Dreamweaver stencil , enhanced a little more and then painted with acrylic paint.
The large background stamp is an Impression Obsession , Cover a card stamp.
The words are an old Paper Artsy stamp. This stamp has been so well used as it is a great saying for a lot of different types of cards and projects.
 
Hope you have enjoyed looking at my work. I have other metal projects that I will post later.
 
Bye for now and thanks for your lovely comments.
 
Carole


Monday 30 September 2013

Decorating Artcut shapes

An exciting time at Alexander Palace


Hello to you all.
Bit slow on posting recently as I have been very busy.

I was lucky enough to be demonstrating for
Artcuts at the Alexander Palace craft show recently. It was great fun.
Exhausting, but I was kept well supplied with tea and coffee by Rebecca, the owner of the company.

 There was a great deal of interest in what I was doing with the wooden laser cut shapes that Artcuts produces in their own workshop, and plenty of positive feedback, which is always lovely to hear.

Thank  you to everyone who came to see us and show so much interest. It was much appreciated.


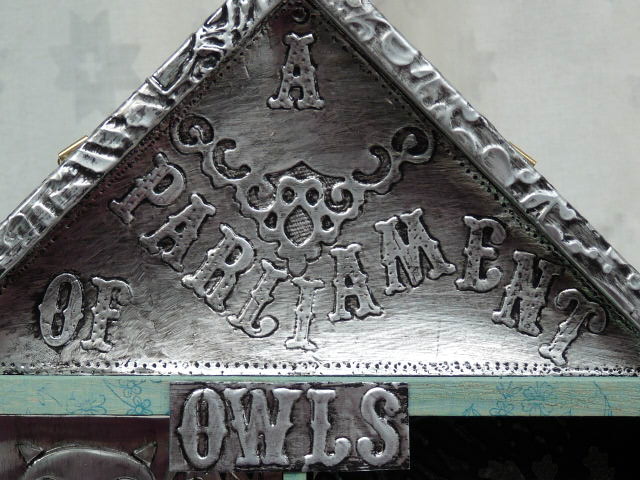
The laser shapes can be decorated in so many ways and are particularly good for stamping onto.
The samples  here  have been stamped with Chocolate Baroque stamps. A big thank you goes to Glenda, the owner, for supplying me with some stamps to use on the shapes. They worked extremely well as they are lovely bold designs. The stamps used were a plate called Artistic Baubles . Six lovely circular designs, five of which can be seen here.


The photos don't do the stamps justice really, which is a shame.
I'll post a few more samples next time .
 
 
Hope you've enjoyed looking. Bye for now.
 
 
Carole

Saturday 7 September 2013

Wedding Card

Die Cuts

Hello.

 Today I would like to show you a wedding card that I made  for a friend recently.


I have used a die cut from Spellbinder for the background and the flowers are from  Heartfelt Creations.


The flowers are stamped first and then die cut, which is great. There are so many different flower shapes, in the Heartfelt creation stamps/dies, that it was a very difficult decision as to which I preferred.


This is quite an unusual card for me to make, as I rarely do die cutting,but I always enjoy the finished result. Must do some more in a similar style!


Thursday 15 August 2013

Laser cut shapes

Hello again.

I have been enjoying using wooden laser cut shapes recently.
I like to work with a variety of products and different techniques or I soon get bored  with what I am doing!!
 I have tried many different crafts over the years but really enjoy stamping and all the related techniques.

 The lovely wooden laser cut shapes, by Artcuts,  are great, as they can be used for stamping and various colouring techniques because they are made from a light coloured birch ply .

The joy of these wooden shapes is that if you make a mistake, it can all be sanded off and redone, without damaging the shape!! Which is always a bonus.

 
So far, I have painted, crackled, heat embossed, inked, stained and covered them with metal sheet.   I have also been  able to use my Crop-a-dile  tool to make extra holes if needed.
 I am sure there is still plenty of experimenting to be done.


This is a necklace I made recently.
The butterflies have been stamped and heat embossed  with Cosmic shimmer powder. The heart is covered with black embossed, metal sheet.

I was very pleased with the result and need to find some time to make some different jewellery in the near future I think!

Thank you  for visiting

Carole

Friday 9 August 2013

Card layouts


 Is it just me or are there others of you out there who have difficulty deciding on layouts for cards.

When I made this card using the lovely Crafty Individuals stamp, I spent ages trying to decide which layout I liked the best. This was even before I  had to make a decision as to where to put the words!!
 I find it useful to take a photo of each layout and then look at them altogether on the screen. This seems to clarify it for me. Although I did think that each one had its merits.


I liked the colours on this card , I used Peacock feathers  and Mustard seed Distress inks, blended together. The die cuts are Marianne D and Spellbinder.
The background stamp was an Artemio stamp.


Have a good day and thanks for looking.
 
Carole


Monday 22 July 2013

Oriental style


Hello.
Just realized how long ago it was that I did my last post.
 
 Lots of things have happened in recent weeks and I am only just getting back into doing things and being able to concentrate on crafting again!!
 This is a very unusual occurrence for me!
 
 Thought I would show you some oriental style cards that I did using Oxford Impression stamps.
 I like Oriental style artwork and enjoy creating cards with images like these.

The Geisha in the top sample is beautiful as she sits reading by a window created with a Sizzix die cut. I have made a reflection of the temple in the water, using a brayer. A very tranquil scene.


 This card has a photo style stamped image, which is mounted onto a background made using Versamagic inkpads and a mask.
The background was embossed using the same mask, then inked lightly.
A Memory Box flower die cut is attached to the front, over the text.


The cards above have images from the same set, with the addition of an embossed background (Tim Holtz folder) , and die cuts from Sizzix and Memory box.

Hope you have enjoyed looking.
Bye for now.
Carole


Saturday 11 May 2013

Card for a friend


Hello.
 
 Thought I would show you a card I made with the IndigoBlu  stamp that I used  on one calendar page. I think this is such a pretty stamp. It reminds me of an illustration that was in a book I had as a child.
 
The die cut tulips by Crafts Too work perfectly with it.
I have attached them to the front so that it is slightly bowed. The card will stand up like that , but I stuck a triangle shaped tab to the back as a stand. It is less likely to fall over then. You do, however, need a box to put it in rather than an envelope, so the tulips don't get squashed!


The embossing folder and die cut centre are both by Sizzix.
 
All the items in the project can be bought at The Craft Barn.

Sunday 21 April 2013

Calendar Front Page


Hello.

Hope you are enjoying some beautiful weather, like we have been.
It's lovely at the moment with a gorgeous blue sky and bright sunshine. Really cheers me up. Great.
Our magnolia tree is just coming into bud so I'm hoping the temperature doesn't plummet again to spoil it!

Anyhow, back to crafting.
I almost forgot to show you the front cover of my calendar.

This is my favourite part and I tend to have it showing most of the time, which does rather defeat the object of the other pages!


 I really like metal sheet , stamping and embossing it.  It is a great product to work with.
This was made from some strips left over from another project. They have been embossed with various Sizzix embossing folders, coloured with acrylic paint and scuffed. The flowers were embossed with a Tando mask.


Most of the products used in the calendar can be bought from The Craft Barn, which has recently moved to Priory Farm at South Nutfield.  It is still in a barn but a modern, converted one. It is bright and airy and 'stuffed' with lots of crafting goodies.
 Why not pay a visit and enjoy!

Thanks for visiting.
Bye for now.

Carole
                      

Monday 15 April 2013

October November December

Hello again.

 Hope you have enjoyed looking at my calendar. Today I have the final months to show you.


October : An owl had to appear somewhere in my calendar! I just love this IndigoBlu stamp, it's such a beautiful illustration of a Tawny owl , I think. There is a wax resist technique on the background of both of them. Unfortunately, it is difficult to see in the photo, but it is a leafy effect, made with a couple of leaf masks.


November: This page was made with a napkin that Barbara, one of our group, kindly brought in for us all to use. The colours on it were lovely, really autumnal. I stuck it onto card first and let it dry , then cut the squirrel out. The background was another section of the design, which I stuck directly onto the calendar page.


December: Two different pages again. The top sample is the pretty Woodware robin stamp on a Marianne D die cut shape. The bottom page is made from another napkin, that Jan brought for us to use.  Several of us are cat lovers so this worked well for us and was cute for the December page.
 
 
So that's the whole year . I hope you have enjoyed looking at the pages as much as I did making them. My mind is already buzzing, trying to decide what I will make for 2014. So many lovely stamps around , it will be a difficult decision!
 Bye for now.

Thanks for visiting.
 Carole.