Monday 22 December 2014

Christmas


Hello to anyone who is reading my blog and a Happy Christmas to you.

I have actually made some Christmas cards again this year.
I usually leave it so late that I just don't get them finished!

I bought a lovely Stampendous stamp which is suitable for winter birthdays and Christmas. I found it could be a robin or a blue tit or any other little bird actually.
One of the cards was coloured to look like a long tailed tit.
I think it's a very pretty stamp and have enjoyed using it.


This one was stamped onto a wooden laser cut bauble, by Artcuts. It could be taken off the card to hang as a decoration as there was a message stamped underneath as well.
On the back I stamped a lovely Christmas verse from Hobby Art.


The delicate shimmer on the cards was created with a Wink of Stella clear pen, from Hobby Art.
 
Best wishes to you all for 2015.
Carole

Wednesday 26 November 2014

A present to myself


Hello to anyone reading my blog and thank you for visiting.


I have been having a play with metal again and decided to finish altering a box that I have had for ages.
 I made one similar for a friend ages ago but didn't get around to finishing mine.

This lovely wooden square box was given to me as a gift, it was filled with a gorgeous Belgian chocolate cake. The cake was delicious but I was equally excited about the lovely box it came in!
Perfect as a base for a metal embossed lid and perfect to store my sampler pieces of embossed metal I was working on.

So here it is.


I am really pleased with the finished result and am planning to cover the lid of  another box I have if I can find the time.
 Embossing metal is a technique I really enjoy and I certainly should do more of it.

I planned out the design on a piece of paper first, to make sure  the words fitted on well and left room for the dragon.
The dragon was stamped onto the metal with StazOn black ink first  and then the words were fitted around. I coloured the dragon with alcohol ink.
Once it was embossed and coloured, I in filled  the back with quick drying filler so that the raised embossing did not get flattened when handled.

It was then stuck on with strong double sided adhesive and a strong glue.
 I used  a very old Creative Expression dragon stamp, die cut letters and an embossing folder to create the design.


Until next time.
Carole

Monday 3 November 2014

card for a friend


Hello.


Just a quick post today as I've just realized when my last one was put up!!

My  card making has been very spasmodic recently but I have managed a few cards recently.
I made this one as a wedding card, using a favourite Chocolate baroque stamp. The heart could be taken off as a decoration.


 Hope you like it.


Wednesday 24 September 2014

Time for tea.


Teatime plaque

Hello again.
Welcome to anyone I met at the Handmade fair on Friday, at Hampton Court.
What an amazing venue!
I had a great time speaking to new, and experienced crafters, and there was loads of interest in the Artcuts products.

I hope everyone who came had an enjoyable day and thank you for all the positive feedback.

Just a quick post today to show a plaque that quite a few people admired.


The board was painted with the pink coloured acrylic paint, left to dry, then a crackle glaze put on top. When this was dry, I painted over with the light colour and left it to dry and crackle.
 
 
The teapot and cups were painted and when dry, I scuffed the edges.
The heart shapes and letters were stuck down with full strength PVA glue.
The stamping was done with a Versafine black inkpad, using stamps from Hobby Art.
 
Seeing the photo of the plaque now, I think it would have looked better if the flowers had been stamped with a pink colour rather than black.
Next time!! 
 
Thanks for visiting
Carole


Wednesday 3 September 2014

Artcuts Dog

Hello everyone.

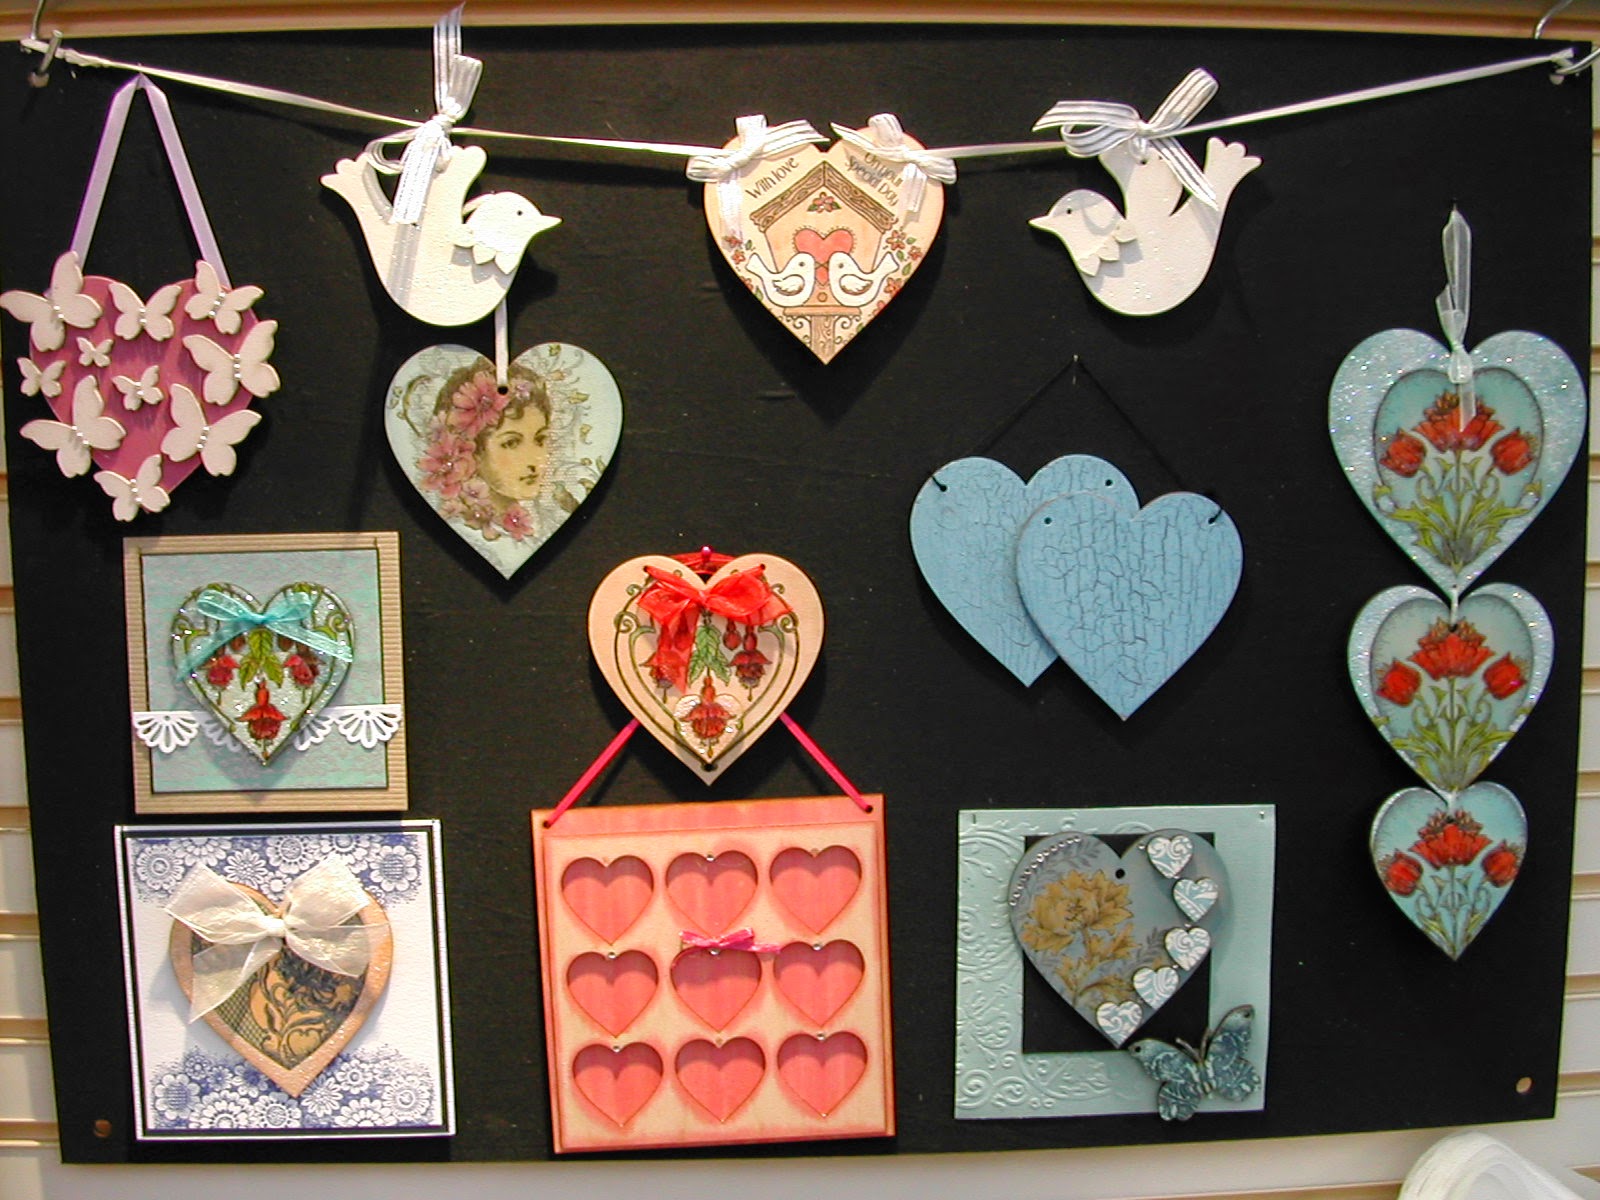
I've been having great fun playing again with the wooden shapes.

On a previous post I showed you a cat that I had made with various shapes, and I felt that the dog enthusiasts were being left out.

So,  here are the dog samples I did for the Stamparama show in Stevenage recently, and I think they turned out really cute.
It's a toss up as to which I prefer.


The black dog's body  had a design stamped onto it and embossed with silver embossing powder. I used an Inkylicious  butterfly stamp for this as it has a lovely flourish design for the wings.
It was then painted over with a watered down acrylic paint. Some areas were then covered with a silver metallic pen and ,when this was dry, sanded back.


The brown dog was coloured with Distress stains.
These are lovely on the wood as they are transparent and you can still see the patterns of the wood grain underneath, which I like to see.
The ears and tails are different shapes in both dogs and the eyes are slightly different sizes. The bone added a finishing touch.


The dogs were quite well received, particularly with the youngsters who attended the show.

I always  enjoy chatting to people when I am demonstrating  and getting feedback from them. I particularly like to listen to the children as they are always very open with their comments.

 One young lad wanted to make the brown dog and we discussed how it was put together and he took a photo to remind him. I explained to him how I always take ages to find the expression that I like. By moving the eyes and nose into different positions the expression can be changed.

I usually draw around the shapes and put the facial elements into different positions to see which expression I like best. I "waste" so much time doing this, but time well spent I feel!

He agreed that this was a good idea and said that he wanted a sad dog.  I showed him how the eye position can be changed to achieve this. He also observed that the head piece on each dog was a different way around. Again this changes the look of the face.

As he went away he thanked me and earnestly told me that he thought he would be spending quite a long time making the dog to get it just right.

That made my day!
To think that he was going to get so much enjoyment out of making the dog, just as I had done.


I asked him to take a photo to show me next time. I hope he is able to as I'd love to see what he did.

Since writing this the young man  mentioned above has sent Artcuts a photo of his work. He did a good job . It looks great , well done to him.

Hope you like them too.
Enjoy
Carole

Wednesday 6 August 2014

More Artcuts hearts


Stamping onto wooden hearts by Artcuts

 I thought you might like to see a few more hearts stamped with some of my favourite stamps.

I generally like to use fairly bold designs, as you can see. They are stamps from various companies.
 Chocolate Baroque, Indigo Blu, Woodware, being the main stamps I like to use.


This is one of my particular favourites by indigo Blu. I have done several things with this stamp and am in the process of making a necklace pendant at the moment.


He just needs some crowns to go either side of him, to complete the banner.
It's so sweet.


I have stamped straight onto the wood with Versafine and then coloured. with watercolour pencils. The background colour is done with a variety of mediums, Versamagic and Brilliance inkpads are my favourite way of colouring the backgrounds but slightly watered down acrylic paint gives a lovely light  wash effect, and can look good too.
 
 
This is a close up of one of my favourite cards. it is stamped with a gorgeous fushia stamp by Chocolate Baroque. The background paper is one of the lovely handmade screen printed papers that Artcuts sells.


I have overlaid a smaller heart over the big heart, although it is difficult to see this in the photo.
 
Thank you for visiting.
 
Carole

Wednesday 16 July 2014

Flower pot card for a friend


Hello to anyone reading this .

Welcome to my blog and thank you for visiting.

Haven't been around blogging for a while as I have recently had a cataract operation and crafting and blogging has been a challenge, as my eyes are unbalanced at the moment.
An interesting experience!!


The card I am showing today is a flower pot card that I have made for a friend who likes gardening.
I really like this design which has been around for ages, but I have only made it once before.

It took me quite a long time  to cut  the  flowers out and put them together, but I think it was worth it.

The pot was cut from an embossed piece of card and the size adjusted to fit well with the large flowers.


The flowers are made with Heartfelt Creations stamps and dies.
The leaf flourish is a Marianne D die I think.

A message is written on the card  which pulls up from inside the pot.

Below is another version which is smaller in size and I used a poinsettia die.


The photo does not do the colours justice as they look a bit washed out! Terrible photography on my part.


Can't stop making them now and find making the flowers quite therapeutic.
At least it uses up papers that I have had in my stash for years!!!
 
Hope you have enjoyed looking.
Please visit again sometime.
 
Carole

Monday 9 June 2014

Teddy Bears' Picnic

Hello to you  all on this gorgeous sunny Monday.

Hope the weather is being kind to you wherever you are.


Today I'm doing cute!

 This doesn't happen very often , but I have a Teddy bears' picnic plaque to show you, which was made with some of the Artcuts shapes that I haven't used before.


The Teddy's were painted with watered down PVA glue and then glitter was sprinkled over.
Very simple but effective.
When dry , they were sprayed with a cheap hairspray. This stops the glitter from coming off so easily.

The plaque, bunting and cupcakes have been coloured with Versamagic inkpads and then stamped with letters from Hobby Art.
This alphabet set of stamps is great as they are just the right size for the little triangular bunting shapes.

As I'm on a cute theme, this is a plaque that I did around Easter time too.


The stamped background  is done with Chocolate Baroque Floral Edges stamps.

Thanks for visiting.
Carole


Friday 16 May 2014

Heart Cat


Heart Cat

Hello  everyone  and especially to Hilda who has just joined as a follower of my blog and who I met at the Biggin Hill craft show last weekend. 

Hello to anyone else who visited us on the stand. I really enjoy talking to other crafters about using the laser cut shapes, as there are so many things you can make with them.

I love playing with the various shapes, and I created a cat as a sample.  Quite a few people liked it ,which was very pleasing, as I have to say I think it is my favourite design so far. Thank you for the lovely comments that were made.

It utilized a mixture of shapes.
I made the face as a separate item a while ago, and I wasn't very pleased with the finished result, so I rubbed it down and put it to one side. I was going to make it into a brooch for myself.


Then I started to play with a large  12cm.  heart and embossed it with silver powder using the Inkylicious Butterfly Flourish stamp. It was then washed over with watered down black acrylic paint.
 Having done that, I realised that the face was just the right size to fit onto the upsidedown heart , which created a body. All it needed was a tail, feet and whiskers.

Below is the finished result.


The ginger version was my second attempt and has been stuck onto one of the flat pack boxes, to create a pencil holder.

I positioned the eyes differently, so that the cats have a slightly different expression.
The pattern on the body is embossed with gold jewel embossing powder, with Distress ink for the ginger colour.


These are the two cats together before I had found the orange jute string and the gold thread for the whiskers and tail.


The tails on both cats have a thin wire twisted through the jute to stiffen them slightly, so that they don't flop.
 
 
Hope you have enjoyed looking at these as much as I enjoyed making them.
Thanks for visiting.
 
Carole


Friday 18 April 2014

A Card for mum


Hello.

Thought I would post the card that I gave to mum for Mothering Sunday. I know this is a little belated but just found the photograph that I took of it .

I was really pleased with the finished result and the heart could be taken off and hung as a decoration as well.

 Hope you like it.


The stamp I have used is a Chocolate Baroque bauble stamp.
This stamp is a particular favourite of mine as I think it is a lovely design.
 
The heart is made from birch ply and is sold by Artcuts.
It has a lovely surface to stamp onto. I then put Glossy accents onto the flower, and, when dry, swiped a VersaMagic inkpad over it.
The edge was then glittered and a crystal style strip stuck on.
 
Thanks for visiting.
Bye.
Carole

Saturday 22 March 2014

Old Crock cards for men


Hello everyone.


 Just realized that I haven't posted anything for ages!!
Today I have cards suitable for men.

 Always difficult I find as I don't seem to have much male orientated stash! However, I do like this Old Crock stamp from Hobby Art and I have stamped it onto metal and acetate for my samples.


 This design uses metal sheet, stamped and embossed.
I love this technique and I never tire of using metal on my projects. The Happy  Birthday stamp is a Woodware, stamped onto shrink plastic. It was a good size when shrunk. The eyelets have been set using a Crop-a-dile, which is a great tool and easy to use.


The car is stamped onto acetate for this sample, and coloured on the back with metallic paint. I have spray mounted it onto an embossed background.

The Sizzix die cut frame compliments it well  I think, and is just the right size to go around the car.


The backgrounds are embossed with different Sizzix embossing folders, to give some texture.

All the products used were purchased at The Craft Barn.

See you soon.
Carole


Friday 21 February 2014

Gorgeous new stamps

Hello

Thank you for visiting.


I was very excited recently, as I received my delivery from Chocolate Baroque and couldn't wait to use the new stamps I had ordered.
 
 I bought a flower border set and two baroque hearts which I have been wanting for a while .


I immediately stuck the rubber stamps onto the cling mount and got the clear stamps ready to try them out.

                                           Oh boy!!! Are they gorgeous!!


I have stamped the hearts onto Artcuts laser cut heart shapes.

The poppy baroque and fushia baroque are such beautiful  images and work perfectly on the hearts, giving lovely bold designs.


You will be able to see the samples for real if you are able to come along to the Farnborough craft show at the end of February.

                             Artcuts will be there with a demo table this time.
                                             Look forward to seeing you.
 Please mention that you saw the samples on my blog if you come to see us.


The border stamps are great for making base cards to display the stamped hearts, as you can see above.


I just love the Chocolate Baroque designs and they work so beautifully on the heart shapes.

Hope you have enjoyed looking.
Carole 


Saturday 8 February 2014

100th Birthday card


A century old!!  Wow!!


We had a very special event in the family this week, as we celebrated my mother-in-laws  100th birthday.

I pondered for ages as to what type of card I would make, but decided I liked the format of one I posted previously, which I did as a wedding card.


                            I have used:
       Spellbinders - background die
                         Heartfelt Creations - Stamps and die cuts
  Artcuts - lazer cut butterfly
Distress inkpad - Peacock 


The etched heart above is from Artcuts and I have lightly inked around the edge.The family all signed their names on the back as a memento of the day.


Unfortunately my mother-in-law managed to fall at home, the day before her birthday, and broke her hip, so she spent her special day in hospital. Having had an operation the day before she was a bit "spaced out" and we are not sure whether she really recognized some of us.  She looked surprisingly well all things considered.
Ten members of the family all piled down the hospital and as she was in a room on her own, the ward let us all go in together and we had a little party with cake and tea. All the cards were opened, but pride of place, of course,  was the card from the queen, which she showed everyone who passed.

The staff were great and made her balloons and a special birthday hat and bought cup cakes for her.
She got lots of attention from everyone which she liked, of course.

Not the ideal way to spend your 100th birthday and she was most annoyed that her party had to be cancelled, but we shall have that celebration when she gets out of hospital.


Thank you for visiting my blog.
 
Bye for now
Carole


Wednesday 29 January 2014

Metal embossed card

Hello again.


As promised, I have posted another metal embossed card that I sent to a friend this week.


The flower was stamped onto a light coloured metal , embossed and then coloured with a rose pink metallic paint.
 
Sorry,
can't remember the make of the stamp as I stamped it a while back and had it sitting in my "bits" box. It is a lovely open design which is very suitable for embossing.


This card was also a gift , to a friend of my mum, who is as obsessed by owls as I am!!


It has been cut out of metal using a Tattered lace die. I mounted this onto a piece of black felt and cut around it, then attached a brooch pin onto the back.
I think this owl is a very pretty shape. Must get around to making one of these for myself!! The embossing folder is from Sizzix. It is a very useful frame.

                  Hope you have enjoyed looking, and please visit again.

                                                             Carole

Monday 20 January 2014

Metal embossing

Hello

Just a quick post today, as I haven't done one recently!!

I have been inspired, at the start of a new year, to create some projects with metal.
It is a product I love to use, but haven't actually done much with it recently.


The sample below uses metal tape and is useful when working with delicate stamps.
It can be stuck onto a piece of card then stamped onto with Staz-On ink. The ink needs to be dry before the design is traced over with an acrylic embossing tool. This gives a delicate embossed look.

This is a Hobby Art stamp
 
The metal tape can also be stuck over die cut shapes and then worked with the metal tools. Some interesting designs can be created this way, particularly for book covers.
 
 
Some more metal embossed cards to follow.
Bye for now.
Carole