Tuesday, 17 November 2020


Hello.  

 I've been having a bit of bother on my computer with the new Blogger format!!!
It's driving me mad. with the other interface I could do a post in a short time, not now!! Anyhow I'm hoping it is sorted now and hopefully I know what I'm doing. Fortunately I have a very patient, experienced computer literate husband, who has sorted it. I HOPE!

More samples from the Hochanda programme.
Hope you like.


I like this stamp, it is very versatile. Same one as in my last post.


That's all for now.

Chocolate Baroque will be on Hochanda again in the first week of December.
Hope you can view or record the programme.

Bye for now and happy crafting.
Hope you all keep safe.
Carole  😊😊


Monday, 7 September 2020

New Chocolate Baroque stamps September 2020

Hello to you all. Chocolate Baroque have a one day special show, starting Wednesday evening. Showcasing their new stamps. Here is one of my samples I sent for the show. I hope you will join us all to see the shows and see what the other design team members have made.
Bye for now. Happy crafting. Carole :)

Monday, 6 July 2020

New stamps by Chocolate baroque


Hello to you.
Tomorrow, 7th July , Chocolate Baroque are launching a new range of stamps, drawn by Kim Moody.

Quite different from their normal range as they feature images and sayings from the Native Americans.

Just a sneek peek at one of my contributions for the show.


Hope you will tune into the show at 10am and 2pm as the design team have had fun with these stamps.
 
Stamps :-    Catching dreams
                 Do right always
    Hold on
 
There will also be other stamps on the show which coordinate well with the new ones.
 
Happy crafting
Carole


Wednesday, 27 May 2020

Chocolate Baroque Guest designer post 3 - Notice board


Hello everyone.

This is my last project for this GDT session.  Hope you like the idea.


I have found this item very useful in my household, for leaving quick messages for my husband and vice versa.

Stamps used: Mellow fruitfulness and Autumn Poppy.
Distress inks,  Versafine, laminator, Whiteboard pen.
 B


I coloured my backgrounds with different yellows, oranges and red, then spritzed it so the colours bled and left a speckled pattern.
 
The top section was stamped with black and clear embossed to give it more depth.
Some areas were then coloured with water colour pencils and highlighted with a white pen.
I then cut it to the required size and trimmed the other two sheets similarly.
 
These were then over stamped with the various designs on the sheet  with smokey grey Versafine. If you want it bolder then use black.
 
Once completed, they were laminated too.  I used my old Cropodile to put the rings on and joined them all together with wire loops.
You could tie them together with fine ribbon , which would look pretty too.
I didn't have any jump rings big enough , so I wrapped my wire around the handle of a paint brush, to make oval jump rings.
The back of the sheets were decorated too.
 
 
You can write on this with the whiteboard pen and then rub it off easily when finished with the message.
 
Hope you have enjoyed my projects as much as I enjoy looking at what you are all making and happy crafting.
 
Stay safe
 
Carole


Wednesday, 20 May 2020

Chocolate Baroque Guest Designer- project 2 - Ribbon holder and happy heart.


Hello everyone.
It is my slot as a guest designer again and today I have  two projects for you using the Tranquility set of stamps. A lovely oriental style theme.


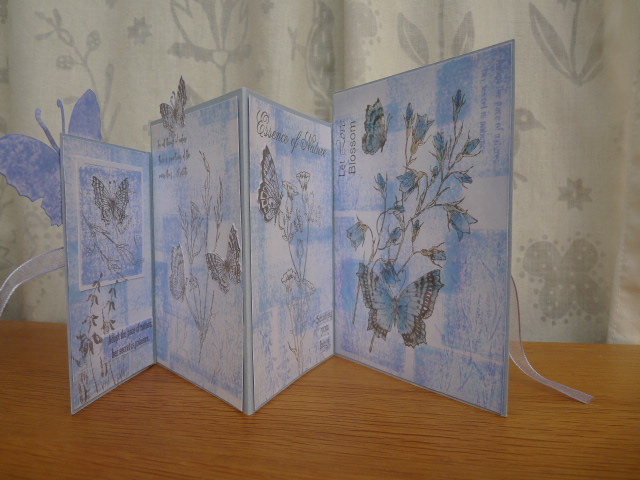
The first one is a ribbon holder, which I have found useful . If you like the idea you could have a different one for each colourway. They would look pretty sitting on the shelf.


 I have used an empty cardboard container and cut a piece of card to wrap around it. This was then decorated with various stamps from the set  coloured and stuck onto the cylinder.
The top edge was decorated with silver foil  over the strong , red double sided tape.
Holes were then punched around the edge with my punch.


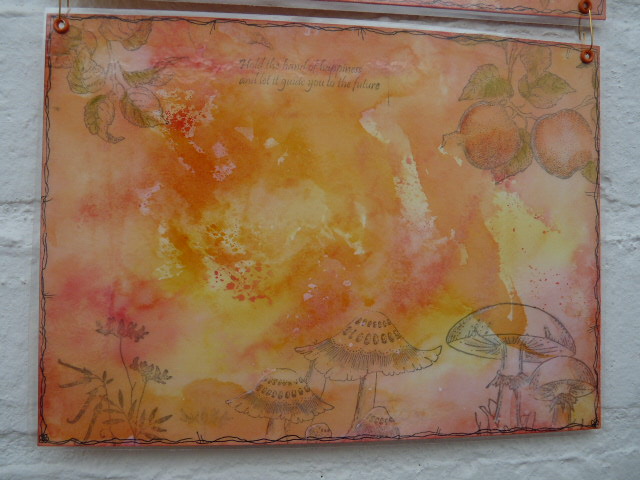
The heart would make a lovely accompaniment for the ribbon holder, if giving as a gift.


Products  used:  Tranquillity stamp set, 12cm. heart, black paint, Versamark inkpad, silver embossing powder. Beads and card to back.

The heart was painted black and left to dry thoroughly.
I swiped it over with an antistatic bag. Particularly important as I was using metallic powder and this has a tendency to pick up every finger print on the project!
The images were then stamped and silver embossed. As my heart was wooden, I needed  to be aware and hold it with a clip, I usually use a peg. for this, as the wood gets surprisingly hot.
I then wiped the inkpad around the edge and embossed.
The flowers were coloured with Mica powders, to add a slight shimmer.
The heart was then mounted onto a background colour. Mine was card , but felt is good too.
the beads were then stuck around the edge.

This is a lovely gift for a friend if you can bear to part with it. Mine cheers me up every time I look at it.

                                                 Hope you have enjoyed my project.
See you next time for something completely different.
 
Bye for now and thank you for visiting.
Happy crafting.
Carole

Thursday, 14 May 2020


Four fold card

Chocolate Baroque , Chequered Flowers, meets Visual Image Alice in Wonderland stamps.

These flowers immediately reminded me of a scene from Alice in Wonderland and I was delighted to find the Visual Image stamps on this theme. I made this card for my daughter and was really pleased with the finished result. the cat and caterpillar go so well with the flowers I think.


This was a very time consuming card to make but I was very pleased with the finished result. I hope you agree.
Many thanks for visiting and happy crafting.
Carole
 

Wednesday, 13 May 2020

Chocolate Baroque Guest designer 1- May 2020


                                                                         Four fold cards


Hello everyone .

It is my turn again to show some samples as a guest designer. I always look forward to this and hope you like my three, very different projects. I have used stamps that were highlighted last year as it is very easy to put them away in your stash and forget about them.

I have started off with a lovely four fold design. I really like this folded card  as you can get an interesting finished project.

I decided to do a men's card, using the Eccentric Edwardian gentleman set, Steampunk Travel and Punky Expressions. Very good standbys for a  men's card.


Make a master sheet for the  background paper. Mine was made by just pressing Distress Inkpads onto the card , I usually use two colours, in this case Pumice and Wild Honey.

Spritz the background with water and leave to dry. The ink will bleed slightly and blend with each other.
The elements were stamped with Versafine black and one of the other colours.

The gentleman was stamped onto the card, but the very top of his head was masked so the hat would sit properly. The hat was on a separate piece of card and cut out.
Finally I used a piece of metal, stamped with Stazon and embossed it  to create an embellishment on the front.


Below are two other cards that I have done using this design. One was shown on Hochanda many months  ago but I thought it was worth another viewing for those of you who may not have seen it.
The other was a birthday card for a friend using blue as the background.


Love this colour combination.


Thank you for visiting and happy crafting.
Carole